Analyzing Windows booting + pure luck (AVF part 3)
By Leet on 2025-03-24 21:26:31
Last post, I showed you how I debugged, analyzed and compared UEFI firmware to determine why Windows would not boot. From the results, it was clear that the firmware was not the issue. In this post I’m going to show you how I managed to finally get Windows booting in Apple’s Virtualization Framework.
Legend for AVF blog series
- Part 1: Basic experimentation and intro to AVF
- Part 2: Analyzing UEFI firmware
- Part 3: Analyzing Windows booting + pure luck (this post)
- Finale: Enabling the GPU
Going back a bit
In the previous posts I said a couple of key things while brainstorming for ideas:
Judging by CPU activity, Windows did actually boot. My best guess is that the EFI implementation does not fully implement GOP (Graphics Output Protocol). Windows PE uses GOP as its output instead of loading any advanced graphics drivers.
Trying to boot a full Windows installation with Virtio drivers installed does also not work however, indicatinng that there is more problems than just bad firmware.
You might have never tried this before, but Windows can boot up fully headless. That is: without a keyboard, mouse, or display. Even if GOP would not behave correctly, the system should boot fine. Unlike Windows 7, Windows 10 does not require
INT10Hsupport and/or any graphics during boot.
Windows 10 was not booting inside the AVF virtual machine.
(Yes, I kept the typos)
The first quote is actually wrong, since the firmware was determined to be good. There are however multiple issues with booting currently. Another insight that I am providing now, is that not every black screen is the same. In the case of Windows PE it actually booted. But in a full Windows installatiion more went wrong, indicating there might be further driver issues.
The worst dev ever
I am going to admit I found this completely by accident. I was messing with UTM (macOS QEMU wrapper) because I wanted to use it to run WinDbg through a virtual serial port for kernel debugginng. I decided to use the same base image since it is based on QEMU anyway. I tried using VirtIO Storage instead of IDE because I thought I had done that for QEMU as well. I also selected virtio-gpu-gl (VirtGL), purely because I was curious about paravirtualized performance in UTM. When I tried booting the VM however, I got stuck at a black screen. W h a t? This confused me even more than before. I instantly knew it was the GPU, but I found it extremely bizarre that I got a black screen again. Then I realized the connection: Apple Virtualization Framework also creates a device which (almost) conforms to virtio-gpu-gl.
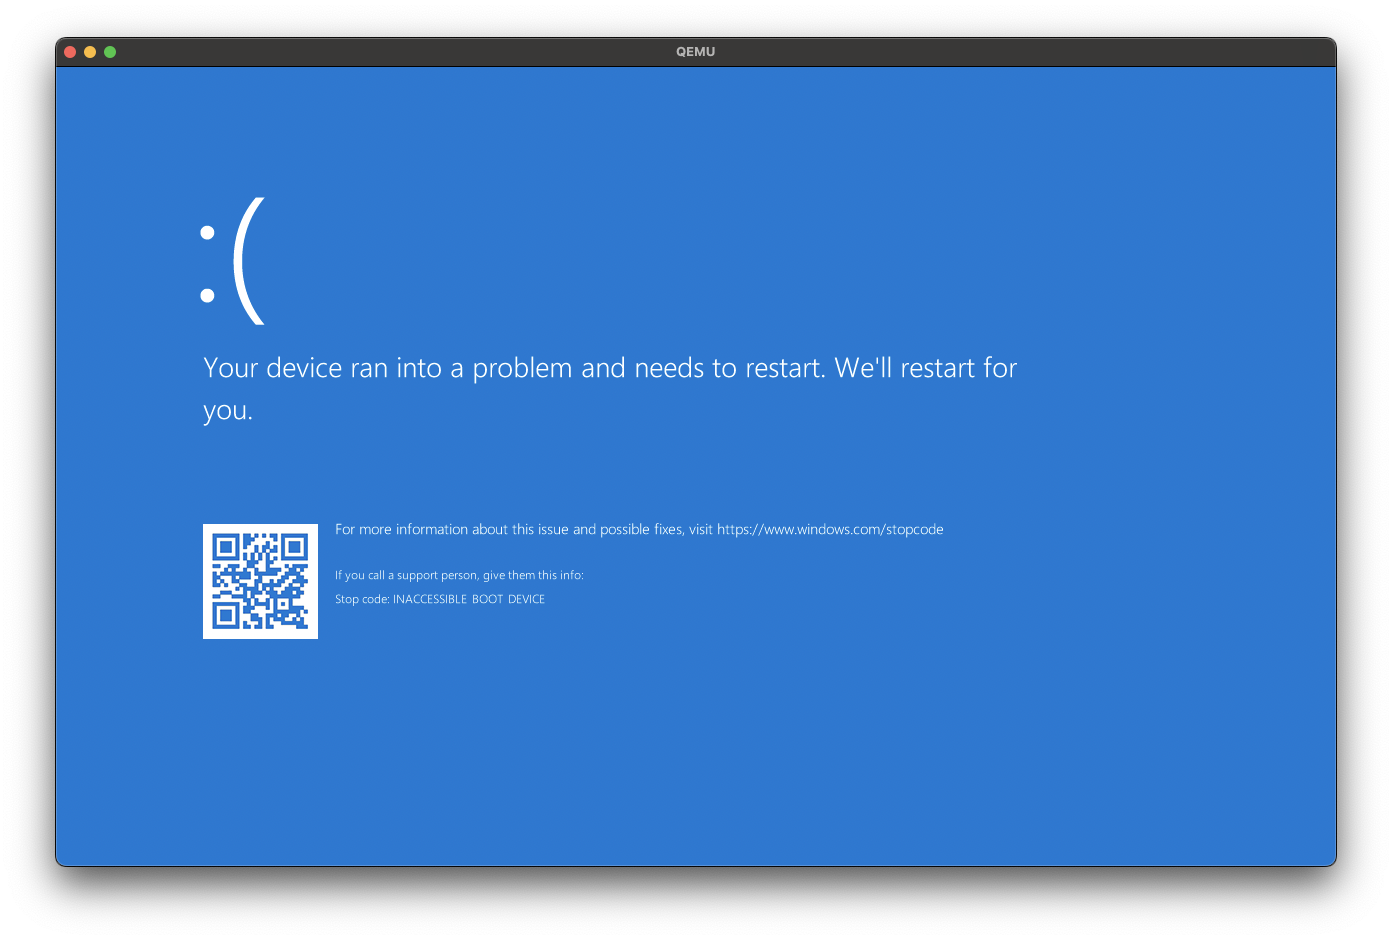
Okay, using VGA graphics temporarily, tried booting again. Here is where the second issue comes into play:

Shit. Here I also instantly knew what was wrong. Even though I thought QEMU (in which I had installed Windows originally) used VirtIO, I had not explictly specified it. The Windows installation was configured for IDE, and NOT for VirtIO Storage. Back in QEMU, I attached the following devices:
- The Windows 10 disk image (VirtIO)
- Windows 10 ISO (IDE)
- Windows VirtIO driver package (IDE)
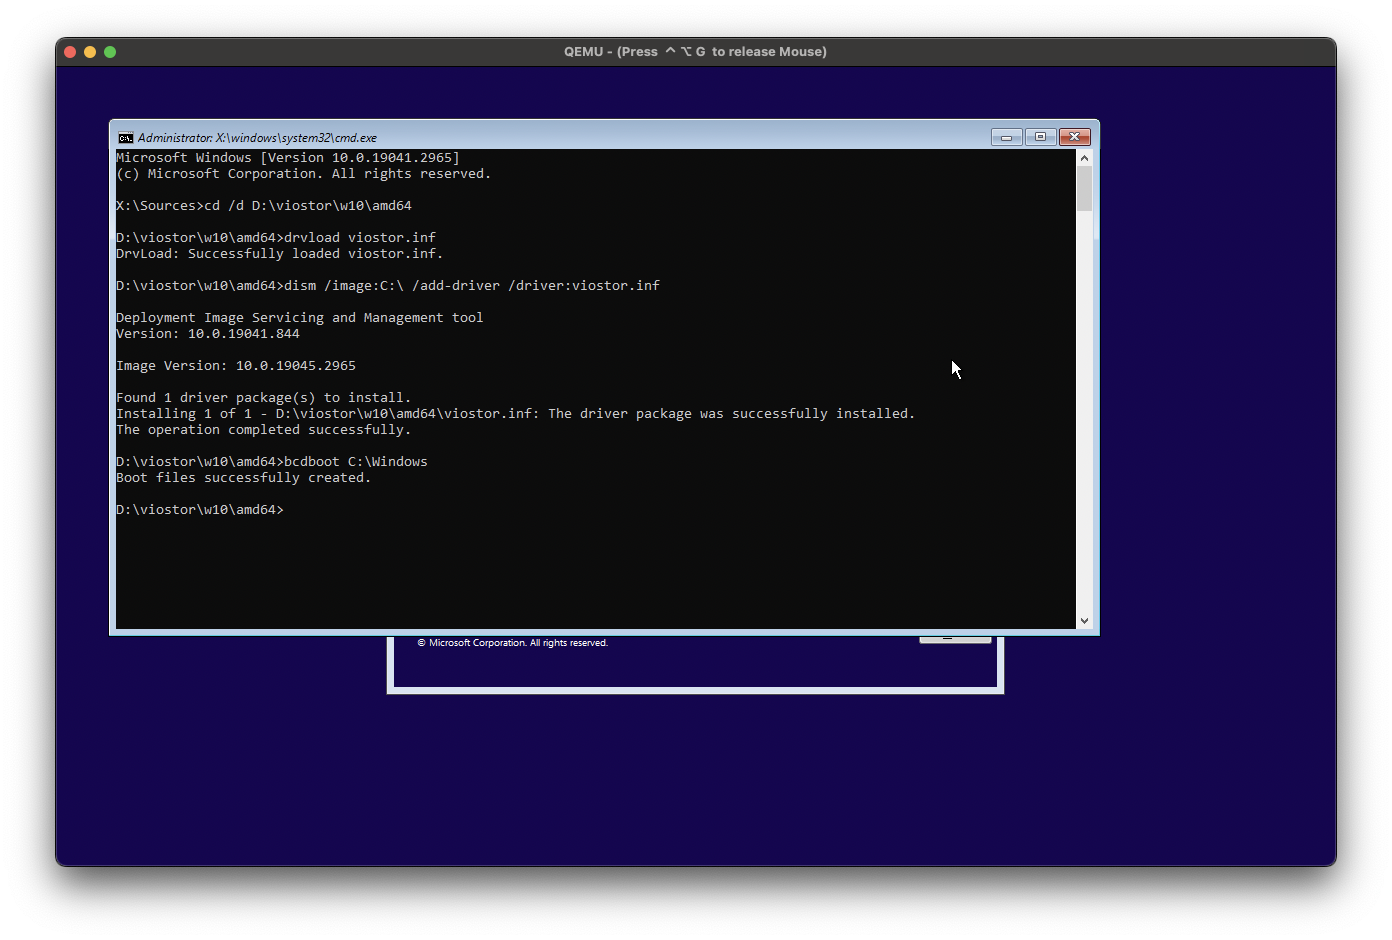
Inside Windows PE, I opened a command prompt (Tip: Shift+F10 opens a command prompt from Windows Setup, al the way until the first login), navigated to the VirtIO dvd and manually loaded the VirtIO storage driver. Then I also added it to the installed Windows 10 image. It already had VirtIO drivers but I thought: just to be sure. I then also ran bcdboot in order to reconfigure Windows to load from VirtIO instead of IDE. It will automatically figure this out based on where it is currently attached.

Back to AVF
With the VM reconfigured to load Windows from VirtIO, I loaded it up into AVF. Still no display output, but my laptop went WILD. I looked at activity monitor and determined that Windows is finally booting and is now updating. Again, it was pure luck that Windows started updating before I shut it down in QEMU, but still a huge win in my book:

But still, with no display output, I decided to do a test. My last test described in part 1 was a bit inconsisten so I decided to just use Remote Desktop Protocol. Inside QEMU, I enabled it and set a password. I then restarted the VM in AVF and waiited a bit. After a minute or two, I ran
arp -a | grep 192.168.64. to scan for the VM. I found it on 192.168.64.7, which is another huge sign Windows is running. I entered the IP address into ’Windows App’ (formerly known as Microsoft Remote Desktop on the App Store, but Microsoft names things weirdly nowadays) and got this prompt:

Sweet Victory

Appendix: Quick overview on how to do this yourself
- Create a raw virtual disk, as that is supported by both QEMU and AVF.
- Create a QEMU VM with the following setting for the virtual disk:
if=virtioand attach a Windows ISO and a (VirtIO Guest Drivers ISO)[https://fedorapeople.org/groups/virt/virtio-win/direct-downloads/latest-virtio/]. Use-vga stdas the display output, since Windows supports this natively. - When booting into Windows Setup, it will not detect the disk, use
drvload VIRTIODRIVERS:\viostor\w10\amd64\viostor.inf. On other platforms you can of course just use the driver for your configuration. I think it might even be possible to boot ARM64 with this setup on Apple Silicon. - Now you can install Windows normally through Windows Setup
- Boot back into Windows Setup and load the driver again. This time run
dism /image:C:\Windows /add-driver /driver:VIRTIODRIVERS:\viostor\w10\amd64\viostor.infto install the driver into your Windows installation. - Boot into Windows now and go through OOBE. Make sure to set a password, otherwise RDP will NOT work. After setting up Windows, enable RDP and install the full VirtIO guest driver package (run
VIRTIODRIVERS:\virtio-win-gt-x64.msi). You need the guest tools for networking. - Create a new AVF VM with the existing disk image. For more info, see part 1 or look at Apple’s documentation/examples. Make sure not to add a GPU, as that will break RDP. Instead, add a network device. You do not need to setup a VZVirtualMachineView, as we can’t get any display output anyway.
- Check
ifconfigin a macOS Terminal to determine the subnet the VM is on. The interface name for the VM will start withbridge. Now runarpto scan for devices and filter on the subnet you just found, eg.arp -a | grep 192.168.64.. You should see your VM in the list. You can now connect to your VM with RDP and the credentials you made in OOBE. - Set the IP configuration in Windows PE to static. That way the IP address of the VM will not change and you can always connect to it.
I have added the required QEMU command and my Swift code for running the VM on the GitHub repository for this blog series here
xx Leet